All About Astro.com
  • Home
  • Blog
  • Astro Gallery
  • Astro Gear
    • Software Bisque Mounts
  • Learning
    • How to Learn Astrophotography
    • A Telescope Buyer's Guide
    • Space is a Landscape
    • Developing a Plan for Our Images
    • Best Data Acquisition Practices
    • The Task of Image Processing
    • Where to Setup Your Telescope
    • Do Dark Skies Really Matter?
    • Astronomy and the Weather
    • Globular Clusters
    • Building a Roll-Off Roof Observatory
    • Choosing a 35mm film camera
  • About Me
  • Jay's Slide Rules
    • All the Rules
    • My Favorite Slide Rules
    • Pickett >
      • Pickett N600-ES
      • Pickett N4-T
    • All About K&E Rules

M42 - The Orion Nebula and a Biology Lesson

2/7/2020

1 Comment

 
Picture
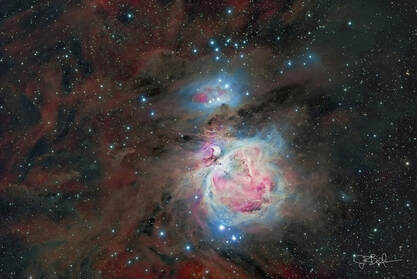
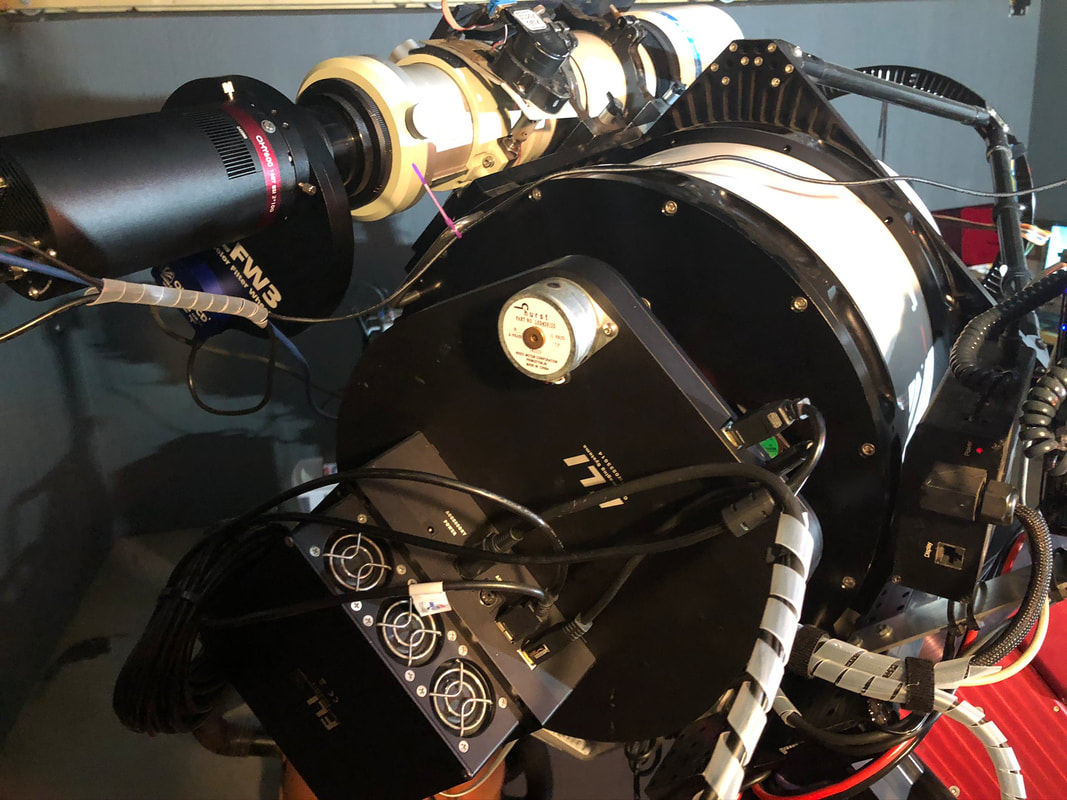
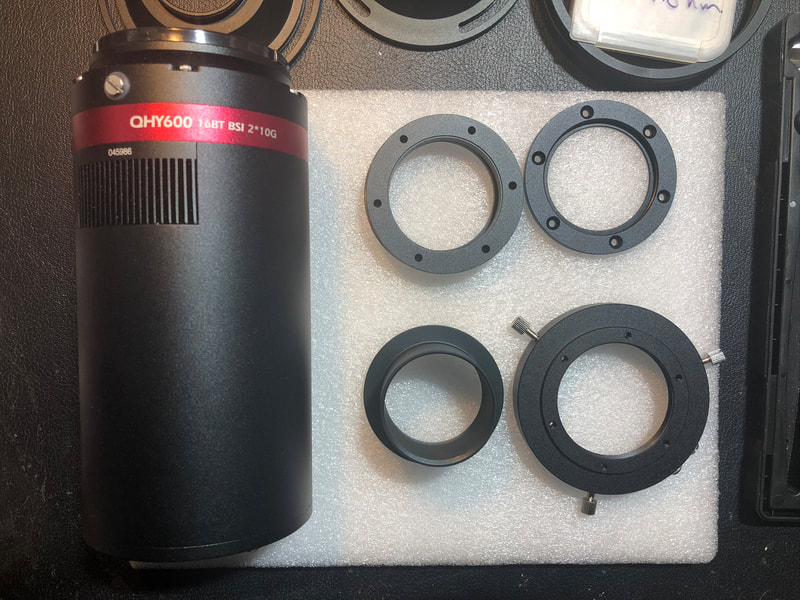
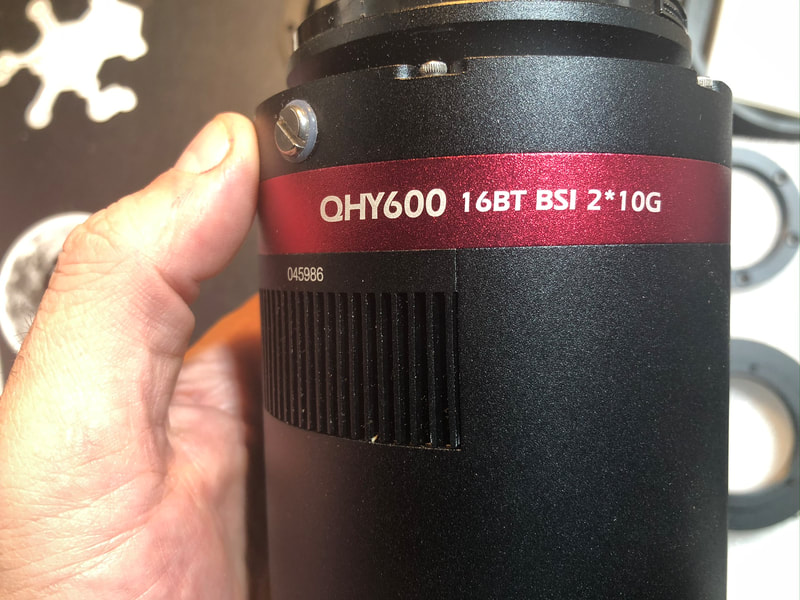
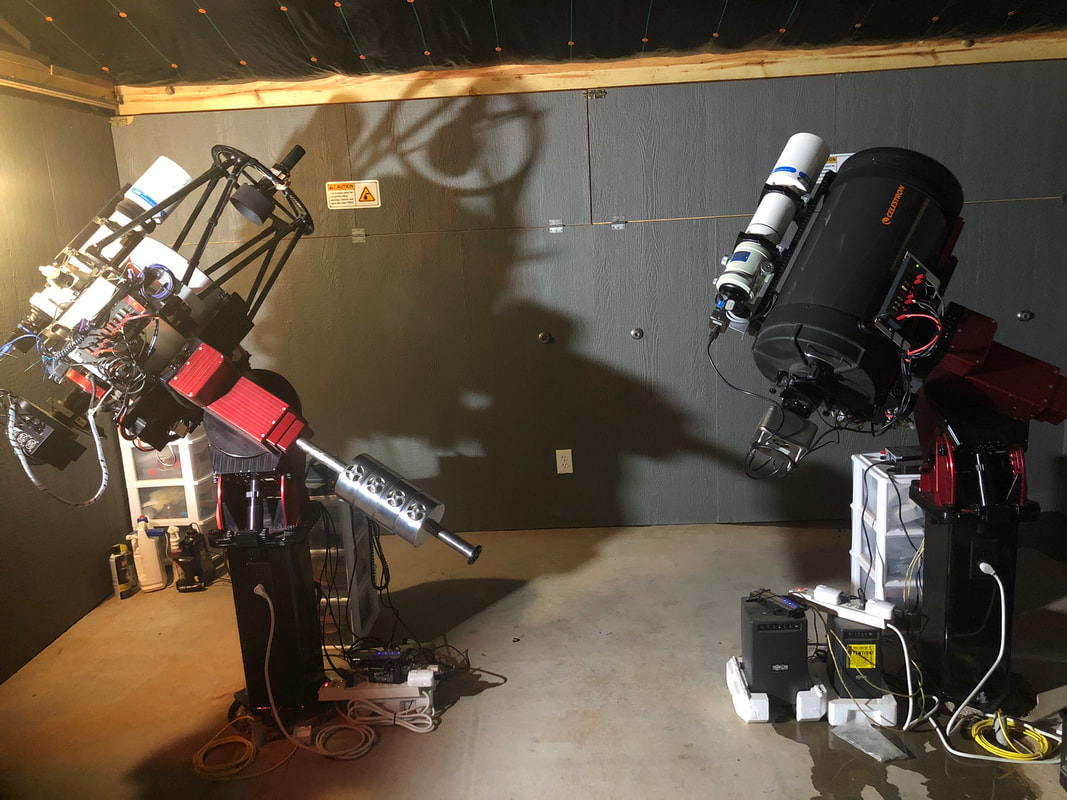
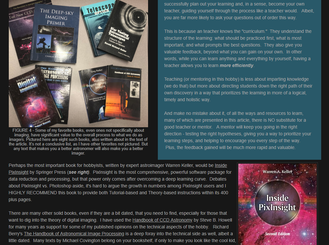
So you've seen the first light grayscale image of M42 posted in the blog a month ago.  The new QHY600m camera in the Conley Observatory at CSAC (www.3rf.org) has great potential, albeit it's not optimally setup yet, both in tilt and back focus distance.  But it promises to signify the end of all CCD astronomy cameras as we know it.  CMOS is taking over. The color version, shown here, was taken in HaLRGB – traditional LRGB enhanced with hydrogen-alpha data.

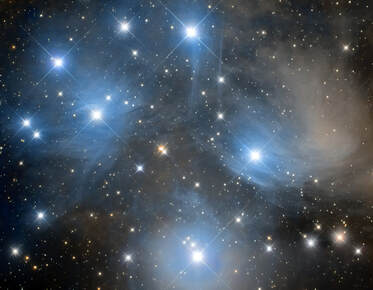
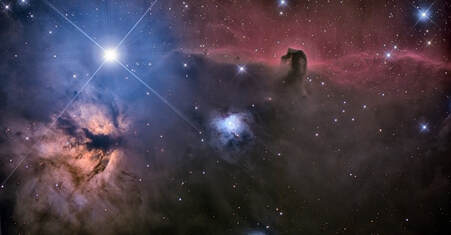
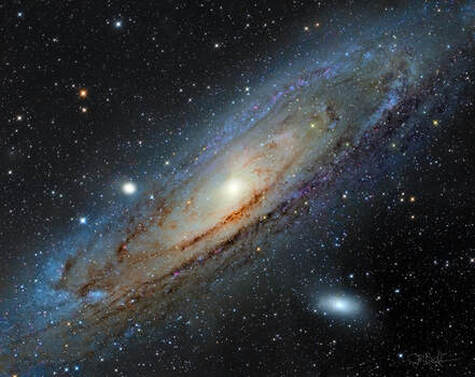
Arguably the brightest and most magnificent object outside of our own solar system, the Orion Nebula is easily visible as a naked eye object, even in light polluted skies.   Shown here with the "Running Man" Nebula, NGC 1977, the views through a small telescope or binoculars are outstanding, and it just gets better in larger aperture scopes.   The bright center portion of the nebulae features four stars of similar magnitude known as the "trapezium."  It's the heart of a massive complex of young stars being formed from the gases and dust which gives the nebula it's shape.  It is truly a stellar nursery. 
 
I took this image during the first couple of weeks in December, 2019.   It took nearly 17 hours of total exposure time to collect enough light through my small, high quality 4” refractor.  While the image doesn’t have to take that long, it becomes necessary in order to reveal cleanly much of the faint dust and gases within the entire ~4 arc-degrees field of view.   Our full moon is a half-degree from our perspective; and so, the nebula itself is not all that small and it demonstrates that we use telescopes primarily to collect more light, not necessarily to “zoom in on stuff.”
 
But I often get the question where the colors come from in my photos; after all, color doesn’t typically appear when viewing through a telescope.    Because of this, many feel that it must be fake, since if your eyes don’t see it, it can’t be real, right?  
 
Well, interestingly, this image of Orion Nebula can also help us with a deeper understanding of Biology.  Go figure!    
 
The Orion Nebula is unique in a very special way…it’s one of the few deep sky objects that can show color visually through a telescope.  People who can see this color will report a shade of blue or green, where our eyes are most sensitive.    The amount and quality of light required to trigger such “color vision” depends on the person.   And this is true about light in general…we all need a minimum amount of it before we can begin to detect the world around us.   We talk about this amount in terms of luminance, which is the intensity of the light per unit area.  These luminance values are collected by both the "rods" and the "cones" in our eyes.   

The highly-sensitive rods - there are 20 times as many rods than cones in our eyes - detect light in shades of gray.  In low light situations, the rods are triggered first.   We accept this fact the moment we put on our red shirts in the morning only to realize 15 minutes later that we are wearing green.  Truly, some people are better than others with color detection in the dark, but why do I feel that I might be the only person to ever put on the wrong shirt by mistake?  
 
Because we are creatures of biology, slowing wearing out as we age, the elderly among us will require a higher threshold of light before vision occurs. As such, in low light conditions, your grand-kids will see you first.    But before either of us can see in glorious color, the color sensors (cones) will need to be activated by a stronger source of light.  Once enough of it hits the eyes, three types of cones collect light in three broad bands of red, green, and blue (RGB).  Once enough light from these bands is sensed, the brain mixes these colors into specific shades.   

The interaction between rods and cones is interesting.  Once the cones activate, the need for rods diminishes.  Our color perception and intensity of light (luminance) becomes almost entirely the result of cone activation during the daytime.  There is an overlap between the rods and cones during periods when it's "sorta dark" outside.  Think about those nights shortly after sunset when you can still perceive color in some of the things around you.  As the cones become more ineffective - the colors disappear - the rods take up the heavier workload.   This overlap is obvious when you consider that as color fades from our vision, it doesn't SNAP from color to grayscale immediately.

Overall, our color-sensing cones can detect wavelengths within a spectrum of approximately 400nm to 700mm, from blue to red respectively, though at the extremes of that range, light is barely detectable.   So in practice, what we see as “true color” will comprise information mostly in the 450nm to 650nm range.   

There are a couple of takeaways to be made from these facts.  
 
First, so much of the light coming from a target like the Orion Nebula is actually outside of our ability to see it with our eyes.   For example, the principle “alpha” line of hydrogen emissions glows (or ionized) at 656.3nm, which can be somewhat imperceptible to many people visually since it's slightly outside that 650nm effective visual spectrum.    Making matters worse, because our black & white-sensing rods are the major workhorses when doing low-light astronomy, they actually have worse spectral capability than our cones.  I’ll spare the reader of a discussion of “scotopic" vs. "photopic" vision and the spectral curves that show how rods and cones compare in this regard,  but doing so would show that hydrogen rich targets like emission nebulae have a lower chance of visual detection than other objects in these light-starved environments.   In other words, not only do the color-sensing cones remain inactive during visual observing, our rods lack the ability to catch the illumination from sources of light that glow in the upper reddish regions of our vision. 
 
The second key point to be made is that light waves exist far outside our eyes’ capabilities of seeing them.   A camera with a silicon sensor (CCD or CMOS) can see a great many wavelengths that we cannot, including UV frequencies down to below 200nm and near-IR frequencies higher than 1100nm.      
 
In fact, an astronomy camera does not have ANY biological limitation, neither in the quality or quantity of light that it can record.   This fact can be leveraged fully by taking additional data with a special filter that ONLY passes or “sees” the glowing hydrogen.  This is why I enhanced this image with hydrogen-alpha data.  It provides details to the nebula that most eyes see poorly, no matter how large the telescope.   So when you see astrophotos advertised to have an “Ha” component, it simply means they’ve added something real to the image that you didn’t know was there.  
 
And isn’t that the magic of astronomy, where our telescopes and cameras can reveal the mystery of the cosmos, going far beyond what our biology can accomplish by itself?    Moreover, doesn’t that say something about what we often regard as “real” vs. “unreal”?   Philosophically, just because you can’t see it or lack the tools to measure it, it doesn’t mean that it doesn’t exist, right?

​Amusingly to me, Webster’s defines light thusly…
 
"light" - /līt/ -  noun     
​1.  The natural agent that stimulates sight and makes things visible.   Ex..."the light of the sun".

 
After our conversation, this definition of light begs the question, "So if light is what stimulates sight and makes things visible, then can we properly call those wavelengths outside our human vision light?"  After all, if you can’t see it, is it truly “light” by definition?    As such, "light" is very much a human construct, the amount and quality of it being highly individual among us all. 
 
But I guess that’s better than calling it electromagnetic radiation! 
​
Hope you enjoyed the image…

Picture
1 Comment

FWAS AP Special Interest Group Presentation...

2/5/2020

3 Comments

 
I had the enormous pleasure of giving a presentation to the Fort Worth Astronomical Society's Astrophotography special interest group last night.   Around a dozen great dudes listened to me ramble on for 2+ hours about this awesome hobby...and I'd like to thank them for acting like I did a good job.  

The area has a lot of talent and willing imagers willing to take the next step in this hobby...and there's no better time than to learn it.   Money can go a long way now, especially with the introduction of powerful CMOS-based, cooled astro cameras available today for very moderate prices.   

The show is a download link (click below)...it will run like a normal show, so just hit the arrow keys to run or space-bar to pause.   

Glad to share with you the awesomeness of our hobby! 
fwas_apsig_2-4-20_show.ppsx
File Size: 54221 kb
File Type: ppsx
Download File

3 Comments

Do I Need PixInsight?   A quick answer...

1/8/2020

3 Comments

 
PixInsight is an all-in-one solution...and if you learn it completely there's no doubt that you will have the best of everything...but that's the problem...you can spend a lifetime and not really "get" PixInsight.   Honestly, it's terrible software from a usability standpoint...but if you approach it from ONE processing module at a time, then you can begin to harness its power.   For example, I use the following PixInsight processes, which I've incorporated one at a time over the years...


- ImageCalibration, StarAlignment, DrizzleIntegration, Debayer, and ImageIntegration for stacking stages.
- HistogramTransformation, HDRMultiscaleTransform, and LocalHistogramEqualization for stretching stages.
- MultiscaleLinearTranform and MultiscaleMedianTransform for noise reduction.
- DynamicCrop and DynamicBackgroundExtraction for cropping and gradient removal. 
- ChannelCombination and LRGBCombination for channel merges.  


There are other processes I'll use when the situation requires it, such as SCNR (green color removal), LarsonSekanina (for comets and solar images), CosmeticCorrection (for residual outlier noise), DynamicPSF/Deconvolution (for sharpening), MorphologicalTranformation (for smaller stars), PixelMath (for a variety of things), and ColorSaturation. 


If you don't tackle processes one at a time from a learning standpoint, you'll truly be overwhelmed...and thus it's usually better to learn everything outside of PixInsight first, so you know what a proper workflow and processing theory looks like, and then explore PixInsight tools as replacements later.  This is, of course, my opinion.


But for me, knowing PS so well, it's sorta irreplacable for many things, especially for processes that require masks or any localized (as opposed to global) image processes (stretches, convolutions, and deconvolutions).   It's just so much easier in PS...there is power in the simplicity.  And I also use a lot of ProDigital Photoshop Actions, which I fine quite powerful if used correctly. 


The one thing that PI does that you can't in PS is that you can process data while it's still linear...a process like MultiscaleLinearTransform allows noise reduction at the linear stage (important) and DrizzleIntegration allows recovery of resolution in undersampled images at the linear stage (powerful).  Processing in 32-bits is also important, something you can't do completely in PS. 


Additionally, PI let's you reduce and stack your data...so it does replace your typical stacking software as well.  PixInisight replaced CCDstack in my workflow completely...and from the standpoint of "doing everything" if you want, PI is a very good value. 


It does seem like there's a "you must own PixInsight" message out there today.   Whether that message is getting communicated directly from its users or if it's just the momentum of the PI train, I'm not sure.   But it does bother me...PS is just so powerful and it's a shame that beginners are getting the idea that it might be replaceable...you REALLY have to know PI for that to happen.  Even so, MANY of the world's best imagers still don't use PixInsight, most notably Rob Gendler. 


For me, Photoshop is MUCH more intuitive...which yields more power, especially for post-processing, channel merges, masking effects, etc.   That's the power of layers. 


In truth, BOTH software has great utility and value.   But if I were to recommend a route for MOST beginners to take, Photoshop would be my most indispensable choice. 
Picture
3 Comments

"First Light" with the QHY600 CMOS camera

12/8/2019

1 Comment

 
Picture
So, I installed a new camera in the Conley Observatory at CSAC this month. The QHY600 camera with filter wheel, seen on the smaller Tak FSQ-106 telescope in the picture below, promises to signifiy the end of all CCD astronomy cameras as we know it.

Why? Because it's the first full-frame (35mm film size) grayscale camera available to astronomers. And because it's a 16-bit back-illuminated CMOS sensor with quantum effiiciency of over 90% (sensitivity), with barely any camera read-noise at all when compared with traditional CCDs, it's pretty much the perfect camera. Moreover, because the camera accomplishes this with really small 3.75 micron pixels (60 megapixels in total), it matches very well with smaller, high quality refractors like the FSQ-106.

The filter wheel holds 7 large 50mm unmounted filters, which currently holds Custom Scientific LRGB filters as well as 4.5nm Ha/OIII/SII spectral band filters, also from Custom Scientific.

Here is a "first light" image with the camera, a single frame shot (4 arc degrees wide) of the Orion Nebula region (M42/M43) taken in hydrogen-alpha. Exposure time is 390 minutes in total using 10 minutes subexposures.

​Remarkably, only a small amount of the M42 core was blown out in the subexposure (massive full-well depth), so I had to mask only a small amount of the core with extra data...in this case with a stack of 50 exposures of 15 seconds each.
The image is remarkable because it shows the capability of the camera, made more so because much of the data was collected over the past few nights with a bright moon in the sky. Likewise, because I was not able to test the camera when I installed it due to bad weather, the camera currently is tilted about 3%, meaning it's not optimal across the field.
​
For those evaluating the performance of the camera (my apologies to the lay person who just likes to see pretty pictures), you should know that this image had slight vignetting in the corners given this setup and was taken with ZERO calibration frames...no darks, biases, or flat fields. The subexposures were taken at -12c, dithered. All pre-processing done in PixInsight 1.8.7, drizzle stacked. The slight vignetting was controlled in processing with the excellent ProDigital "AstroFlat" plugin in Photoshop CC.

For all the talk astronomers like to make about specifics of camera performance, quit being so picky! This camera is better than any camera that preceeded it, including that FLI PL.16803 also in that picture. In fact, you can purchase TWO QHY600 cameras for the camera price as that FLI CCD setup.

It's truly a remarkable time to be an astrophotographer.

Picture
1 Comment

CMOS-based QHY 600 AKA "The CCD Killer"

11/3/2019

0 Comments

 
The new QHY600 "early bird" edition of the Sony IMX455-based CMOS camera is in the house!  

I have been doing some preliminary testing of it and I can say it extraordinary how clean and powerful this camera is.  I'll be writing and showing more of this camera in the future, but I wanted to let you know I have it.  
I'll be deploying this in the Conley Observatory at the Comanche Springs Astronomy Campus (3RF) near Crowell, Texas in Bortle 2 skies.   In the meantime, I'll be shooting some data at home in Bortle 8 Grapevine, Texas!   I aim to show that the camera is good enough to allow for some nice full-spectrum images in really bad LP skies.  

I also have hope that this CMOS camera is the final nail in the CCD vs. CMOS debate...after this camera arrives in the hands of tons of astroimagers, I believe CCDs will be a thing of the past. 
0 Comments

Pleiades (M45) Mosaic - Four Frames of the Seven Sisters

10/16/2019

0 Comments

 
Picture
Check out the newest image posted to the Astrogallery!   It's a four frame mosaic of M45, taken a couple of years ago but only now finished.  Clicking the image will take you directly to the details.

​Known from the earliest of antiquity and mentioned three times in the Bible, the "Pleiades" or the "Seven Sisters," is inarguably the night sky's most beautiful star cluster.  Illuminating the autumn sky, it seems to signify a cool, refreshing end to our hot Texas summer!   

But cool they are not.   Among some of the the hottest stars in the sky, these blue beauties shine brightly from their position approximately 440 light years away. 

So who are the "Seven Sisters"?   In ancient Greek myth, the sisters were the daughters of Altas and Pleione. Their offspring, the "seven sisters," are shown in my image (Atlas and Pleione would be outside the bottom of this frame). 

So where are the stars going?   As they were birthed together, they are moving in mostly the same direction, as sisters like to do, toward the "feet" of Orion from our sky perspective.  Orion, "the hunter," in Greek mythos, is said to be protecting the sisters from Taurus, "the Bull."  So perhaps it's smart of the girls to be headed in that direction.   

​But I wonder if they realize that the bull is actually standing between them and their rescuer in the night sky?  

0 Comments

The Flame and the Horsehead - A Multi-Scale Approach

10/9/2019

1 Comment

 
Picture
The other day, a friend of mine asked a question about multi-scale (or hybrid) imaging. He was considering two scopes with similar cameras to be used simulaneously and he was curious about how optically close the scopes need to be in order to mix together the data. I stated that they didn't need to be all that similar and that I use mixed data all the time.

Here's an example, an image that I completed the other night. Clear-filtered luminance for this image was acquired in November, 2017. It is two frames, 120 minutes of the Flame Nebula and 170 minutes of the Horsehead using a 12.5" RCOS RC and FLI PL-16803 astro camera. This was preprocessed and stitched together in PixInsight.

The color information was shot two nights ago, 186 minutes using the Tak FSQ-106 and a QHY 163c color camera. Individual images were calibrated (bias frames only with the QHY data), debayered, registered (with 2x drizzle), combined and stretched in PixInsight.

The luminance data was merged with the color data in Photoshop CC.
​

The RCOS/FLI combo yields a 0.65"/pxl image scale, while the FSQ/QHY combo captures around 1.5" per pixel. Because I drizzle combined the color data, matching them up in Photoshop was much easier. I used auto-align in Photoshop...which is interesting because PixInsight had a tough time matching stars.

And herein is the difficulty with two diversely different scopes. Most everything matches up well in the images, except the stars. Despite the images being approximate size matches (after the 2x drizzle), the stars are wildly different! So, you have to employ some tricks there..either process some replacement stars from the wider-field image (the easy way), or try to keep the smaller, more plentiful stars of the narrow-field image (the hard way).
​
Of course, here, I chose the HARD way. They certainly are NOT great stars, but there is color on some of them...whereas the smaller ones simple become a neutral part of the background.

The ideal situation would be to shoot some RGB data with the RCOS, but sometimes you can only do what you have TIME to do!  In fact, this RCOS has some severe issues, as you can see clearly by the crazy diffraction spikes on Alnitak.

Usually, the desire with multi-scale imaging is to take your wide-field data and highlight particular objects within the field with detailed data from the bigger scope. This is rather easy, and should probably be the way to approach things. However, as I show here, it is possible to do it the other way around...it's just a little trickier when it comes to the stars.
​
If you are going to buy two scope/camera combos, then anything close in image scale will work well. At that point, you could just throw all the data in a single stack. But as I show here, with a little gentle massaging of the data, even wildly diverse data sets can work well together.

1 Comment

Fixing an old friend...

9/22/2019

1 Comment

 
Picture
We have cool telescopes in the 3RF Conley Observatory.   The setup on the left, which we call "Aries," contains two telescopes, both of which have been in my possession for over 15 years now.  The small one is my Tak FSQ-106.  Don't frown down on it because it has a fixed dew shield...it's a wonderful telescope and has produced hundreds of wonder images for me.   

But the other scope on Aries is an old friend.   I received this beautiful 12.5" RCOS Ritchey Chretien scope in 2004 and, despite it technically being owed by the Three Rivers Foundation (3RF), it's never NOT been my scope.   I'm the only person who ever touched it, well, except for the RCOS people who maintenanced it back in 2010.  

Speaking of which, this is the heart of the narrative...after we closed its old ProDome observatory, we sent it back to RCOS to repair mouse-chewed wiring and for the usual recoat of the optics.   At a cost of around $3500, knowing that my friend was "fixed," we stored the instrument away until we could prepare its future home.   Little did I know that six years later when we built the Conley Observatory, the scope never was truly fixed.  

My travails began when I remounted the scope and checked collimation.   Surprisingly, the scope couldn't be collimated because my method no longer seemed to work - using a "Tak collimator" requires the sight of an annulus of light through the colimator, but something was wrong.   The annulus was missing.   

Thinking I might be missing a spacer in the optical train during collimation, I went ahead and started imaging with it.  Unfortunately, defocused images showed a severe intrusion into the light cone, which only got worse the farther I went off the optical axis.   Nothing changed from the old setup - same SBIG STL-series camera, same spacers, same everything.   And of course when I put the bigger FLI PL-16803 camera on it, the bigger chip just made the optical problems even worse.   Below are equally in and out of focus images showing the issues.  

Call the manufacturer, right?    Well, sure, only now, RCOS was out of business!    

From there, months of troubleshooting began.  I got great assistance from Rich Simons of Deep Sky Instuments (owners of RCOS assets).  I had everybody on the old Yahoo User Group helping me out - awesome people!   Of course all the advice was more about what I had to be missing, not anything truly wonky about the scope.   I needed to be certain about the amount of back focus, check the mirror spacing, collimate using alternative methods.   

Now I wouldn't put anything past me...I'm a reasonably intelligent guy, but I've been known to make mistakes.   But after several YEARS of making trips to the observatory, which is 222 miles from my DFW home, I finally started narrowing it down to an issue with the baffles, with the thought that RCOS might have switched them when they worked on the scope.   After all, I even had a measured drawing, one that showed a different looking secondary baffle than the one on my scope, but because it omitted the length measurements of both baffles, I didn't feel like I could trust it.  But when you've exhausted every other possibilty, you realize that your suspicions might be right.  

But second thoughts and doubts kept creeping back in my head. 

"Why would RCOS do that?   How?"

And the more I mentioned it to my online "advisors," I got the feeling that they were just shaking their head at me.  After all, there's no way RCOS could have done that, right?   It's beyond reasonable that they'd just outright switch them on me.  

Exasperated, I threatened to pull out a hack-saw, because in my mind it couldn't get any worse! 


And then, finally, I found an old picture of my scope, one that showed a close-up of the original secondary baffle.  And sure enough, it was now different!  This old friend of mine who has seen sub-arc second details and diffraction-limited performance had a secondary baffle transplant.   This was the culprit, cutting into the light cone and causing crap performance (more than double the FWHM measures I used to get, at best).  
And it totally makes sense...It turns out that my scope was a 2004 model with a 2.5" long, straight secondary baffle.  This one grew to 3.25" long, with a taper.  Yep, RCOS changed their baffle design for the 2005 model year, and instead of replacing my old beautiful baffle, they switched it out.   I don't know if they got mine mixed up, or whether they thought they'd "upgrade" mine.   But why?  Certainly they knew that to change the baffle you also have to lengthen the truss arms of the scope.   My overall scope dimensions were unchanged. ​​

​So, yeah, I did it.  I cut off the secondary baffle of a $21,000 telescope!   No hacksaw...a Dremel and some sandpaper. 
What you see above is the result, now only 2.6" long.  If you are worried about the accuracy, don't be.  Grinding it down uniformly with sand paper and a digital caliper, my result is within 10 thousandths of length all the way around the baffle.  

This was just enough to return (barely) the annulus of light in the collimator, but it's likely not enough to eliminate the intrusion into the light cone.  But I figure it must be better.  Once I know for sure, I'll likely have to keep working on it, taking off a bite or two each time I'm visiting the scope, sneaking up on the final length, but I'm thrilled with the result so far. 

I finished the job above with some flat black paint, and once I finally get the optimal baffle length, I'll also flock the interior of the baffle with some felt.  

So are the images better?    Well, I don't know.  The roll-off observatory roof decided to stop rolling the next night of clear sky.  So I can't test the scope!   

Have to fix the observatory roof now, and I hoping it doesn't take YEARS.  
​
​The astronomy gods hate me. 
1 Comment

M31 Mosaic - My Largest Mosaic to Date!

9/8/2019

1 Comment

 
Picture
Shooting a mosaic, especially an 8-frame color LRGB image, is not for the faint of heart!   But every now and then we astrophotographers get the urge to push our skills and our equipment.  The result of such mosaics, like this one of the very familiar M31, Andromeda Galaxy, is to achieve fine resolution (detail) as delivered by the long focal length optics WITH the wide field of view typically given by shorter focal length scopes and lenses.   

Meaning? A huge galaxy such as Messier 31, Andromeda’s catalog designation, can be captured completely, yet in terrific detail.  
​
This galaxy (found within the constellation Andromeda) isn’t the closest galaxy to us, but it’s pretty close...only 2.5 million light years away.  That’s 1.47 x 10^19 miles, if you need that perspective.  As pictured, you could fit 7 or 8 or our moons across the disk of this galaxy from our sky perspective. It’s huge and it’s a naked eye object in most rural-to-suburban skies.

Oh, BTW, any star that you see in this image (click on it to see the full resolution image) is in our own Milky Way galaxy, since we have to look through our own neighborhood to see the next. Stars in Andromeda are too small to see from this distance, though you can witness clusters of them together, especially all the globulars that have their own set of designations.

How many stars are there in Andromeda?  Well, you are staring at about 1 trillion stars, give or take a couple.  That is about 4 or 5 times the number within our own galaxy.
​
One of the more intriguing aspects of M31 is that the light captured here first left that galaxy around 2.5 million years ago. In other words, looking into the sky is about as close to actual time travel as we can experience.

This Shot using instruments stationed at the Conley Observatory from Bortle 2 dark skies at the Comanche Springs Astronomy Campus near Crowell, Texas. Equipment includes the 12.5” RCOS Ritchey-Chretien (2857mm focal length), Paramount ME mount, and FLI Proline PL-16803 Astro CCD camera.

Software includes TheSkyX for acquisition, PixInsight for data calibration and mosaic “stitching,” and Adobe Photoshop CC for post-processing.

The grayscale for each of the 8 mosaic frames, which encompasses a amazing 10224 x 8112 pixel resolution, ranges from 90 minutes to 140 minutes per frame, which is right at 16 hours of total time for the grayscale alone. 
Color is taken from two sources.   First is from a 36 min DSLR image of the object I took last year using the Nikon D810a and a small Tak FSQ-85ed apo refractor.   This gives most of the stars their colors, as well as a base hue for the galaxy itself.   But most of the color data was taken using 5 binned RGB frames of the galaxy alone.   This data, shot with the FLI PL-16803, is 2x2 binned averaging 2.5 hours of total time for each frame.  

Total time for the image is approximately 29 hours of exposure.  

it is, by far, the most ambitious image I've ever taken.   It's not perfect, as processing such an image can be quite a challenge, but it's still a nice look at our massive neighbor, one that I hope you will enjoy!
Picture
1 Comment

"How to Learn Astrophotography" article posted...

5/10/2019

0 Comments

 
Picture
Adding to the Learning section of All About Astro.com is a new article written for those wondering how to begin the hobby.  It's the first article in the pull-down menu at top the Learning tab.  Or, you can just click the image at left to get there directly.  

​As with all of my articles, take your time trying to digest all of the information.  This is intended to be a casual read, a look at an overall approach to how you might tackle the learning of what most people consider a very challenging hobby. 

Here, I will take you though the process I believe will prove most effective for you, from the mind of an educator.   I do highlight many of my favorite RESOURCES that I believe will be most useful, which answers a question I get very frequently.   But more than that I talk a little about learning theory, developing an approach to the learning, and how you can properly evaluate your progress.   

Don't worry.  There will be enough examples and funny anecdotes to make the read somewhat enjoyable! 

While the article itself might take some time to get through it, consider it a jumping off point into some of the other articles I've posted...links to those articles are contained with article.   As such, it serves somewhat as a road map to an overall program of getting proficient as astrophotography.

​Please enjoy!  

Picture
0 Comments
<<Previous

    Author...

    For more about me, be sure to read About Me!

    Archives

    February 2020
    January 2020
    December 2019
    November 2019
    October 2019
    September 2019
    May 2019
    April 2019
    December 2018
    October 2018
    July 2018
    October 2017
    August 2017
    January 2017
    May 2014
    April 2014
    March 2014
    February 2014
    January 2014
    December 2013
    November 2013

    Categories

    All
    Eclipse
    Lunar
    Moon
    NEAIC
    Photoshop
    Presentation
    TSP

    RSS Feed

Home

Gallery

Contact

Picture

Terms of Use

All images and content on www.allaboutastro.com
​are copyright by Jay Ballauer. 
​Permission for use and ​proper credit is required. 
© COPYRIGHT 2003 - 2022. ALL RIGHTS RESERVED.